Wednesday, July 10, 2013

Outdated Oak Cabinets Updated with Java Stain

I posted about our master bathroom cabinet update a few months ago, here:

http://www.blogger.com/blogger.g?blogID=8461157380551183494#editor/target=post;postID=4879238404474922297;onPublishedMenu=allposts;onClosedMenu=allposts;postNum=7;src=postname

My mother-in-law loved ours, so while she was out of town I surprised her for Mothers Day by re-doing HER master bathroom vanity cabinet, also. I have wonderful in-laws who are incredibly loving and supportive. I was tickled to bless them in this way!

Here are the AFTER photos:


 My father-in-law was in on the surprise, so he took the light oak medicine cabinet down so I could stain it to match. Here is a tip: If you have brass hinges, knobs or fixtures you want to blend, use Rustoleums Oil Rubbed Bronze spray paint to update the metal finish. It worked well with the java stain here, especially.


It took several more coats than my cabinet did and I was wishing that I had taken a bit of time to sand them, first. The tutorials online say you don't NEED to sand but I found it helpful and worth the extra step. Here is what her vanity looked like, before...your basic builders finish.


Since I adore my in-laws, they got a bonus: I re-painted the bathroom walls, too. They chose the shade, a warm rich neutral that was just a shade off from the previous color. It is always surprising how just a shade or two lighter can still make a room brighter and warmer! If you enjoy your current color scheme but wear and tear makes it time to re-paint, consider going up one shade on the paint chip for a simple but effective change.


My mother in law loves neutrals and her home is always warm, classic and welcoming...like her!


Monday, July 8, 2013

Spraypaint Power!

Here is a very useful tip when shopping at thrift stores or yard sales for inexpensive home decor:
 
 "Look MAINLY at the shape of the item."
 
So many things are still useful, still lovely...but their color screams so loudly of the decade they were sold (the gold of the 1970s, the brass of the 1980s, the forest green of 1992!) that to the untrained eye it all looks like outdated junk!
 
I never see the color, only the possibilities, because I know the power of spraypaint.
 
 
I loved the (very current) gourd shape of this heavy glass lamp.
What I didn't love? The brass ring around the base and the peachy 90's color.
 
The key with painting very smooth surfaces like glass or ceramic?
 
1. Primer first. (I like Kilz brand spraypaint primer)
2. Paint in an area without wind, on a warm enough day.
3. Shake the can until your arm is about to fall off and you hear the ball rattling. Rest. Shake it again.
4. Slow, even strokes about 10-12 inches away will help prevent drips. It is far better to do 2-3 light coats than 1-2 heavy coats.
5. Invest in the better brands of spraypaint. A $4 can of Krylon or Rustoleum is going to do a much better job than the generic versions!
 
Every time I have had a bad paint job with drips or later chipping, it is because I was in a hurry and skipped one of these steps.


These tips will help you transform
vases
pitchers
lamps
baskets
shelves
picture frames
and more!
into lovely accents for your home.


Next time you are at the store, check out the the spraypaint aisle and purchase a can or two in your current color scheme. Then you'll be ready for the next bargain! I love red and use it as an accent color in my home, so I rely on my favorite shade: Rustoleums Candy Apple Red...these items were recently jazzed with it.
The papertowel holder was in a tired brown honey oak, picked up at a tag sale for $1. The birdhook I've had for years, but recently decided its cast iron material needed perking up.


Keep your eyes open, your finger on the trigger, and save money by utilizing the power of spraypaint!


Monday, May 27, 2013

Easy curb appeal, and salt to banish weeds!

Cheerful, happy AFTER!:
 

Winter is over! I celebrated in one of my favorite ways: the annual sprucing up our front entry.

                                                         Sad, neglected BEFORE:


Five years ago, we enclosed our front porch to create a mudroom. I love having that extra space, but miss having a covered front porch when it's pouring rain, as it often is here in Oregon. More than that even, I miss having a cute little porch to decorate!


Our driveway is now right outside the door, and I do love how it makes the constant unloading of the-crazy-amount-of-groceries-my teens-eat a breeze.

Handy, but not very pretty. In an attempt to have an entryway other than dusty gravel driveway, I dug and laid large, simple flagstone remnants into a half-circle, five years ago.

And the weeds found the dirt there, and lo, they multiplied:


 I am very sensitive to herbicides so we try not to use Round-up excessively. My son is a  history buff and so he suggested salt as the solution:

"It's what enemies would do after a battle, Mom! They sowed salt into all the fields so the conquered people wouldn't be able to grow food and would starve."

yikes.

Well, Morton's salt is .28 cents, safe to all but slugs and, it turns out...quite effective!


First, I pulled all the little weeds. Sprinkled a full can of salt around all the pavers and watered it in gently. It's been over a month of rain and alternating sunshine, yet not ONE teensy baby sprout of a weed has popped up...

I am the Victor of this battle!

 
It's a good idea to re-paint your front door and trim,  occasionally. A good scrubbing first, then a light coat rolled on just to erase those scuffs and marks that won't wipe off. Does anyone else have kids that like to kick the door open, when their arms are full? Lots of suspicious tennis shoe marks, here!


What a difference!


I buy a new front doormat every year, as the constant weather exposure wears them out quickly. I like Target's selection but was happily surprised by this floral loveliness, found  at Wal-mart.

Bonus-it matches my fun Summer toenail polish!


A little elbow grease in cleaning and weeding...
A bit of fresh paint rolled on...
A few colorful flowers tucked into pots...
A new doormat laid out...

A fresh re-design that says:

Welcome, family and friends!


Saturday, May 25, 2013

Update your furniture with homemade Chalk Paint

After:
 
 
Before:
 
 
I've had this little end table for years. I had found the vintage gym basket "drawers" for it, long before they were collectible and expensive, and so it has faithfully served in various places around our home for almost ten years. Most recently it was a nightstand in my 13 year old sons' room...and its shabby look got...well...shabbier. A decade of use had left its marks!
 
 
Several nicks and dings and a giant gouge out of the top, yet no one saw how or why...
Boys and destruction...you can't have one without the other, folks!

 I wanted to bring this back into our living room but it was too beat up...I wanted to add some deep turquoise, almost peacock teal color to the room...and I wanted to experiment with DIY chalk paint. Plus, I had a 2 liter of cold Diet Pepsi in the fridge.

It was a perfect storm...
 
 I conferred with almighty Google and found a recipe on
www.inmyownstyle.com/2013/02/diy-chalk-paint-review-update.html
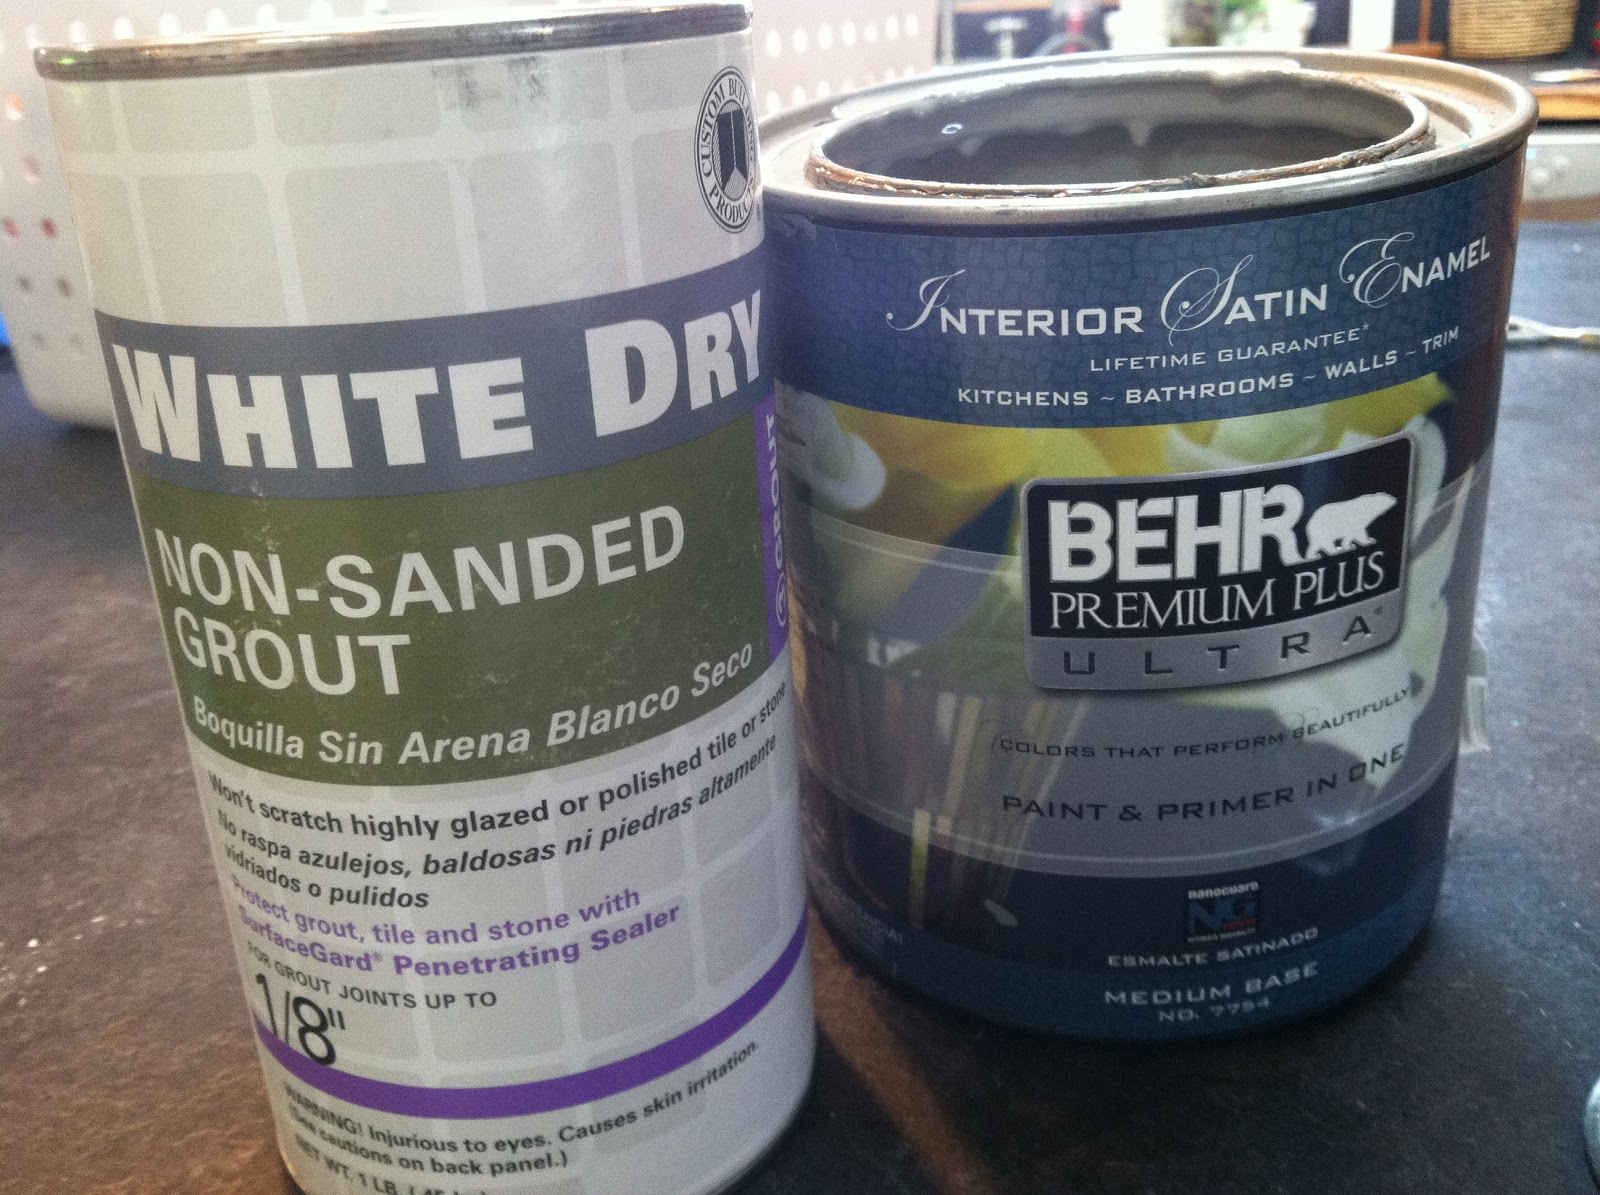
and because of my mosaic hobby, I happened to have unsanded grout, so that's what I used, but you can also use plaster of Paris.

What are the benefits of chalk paint vs. spray or latex, you ask?

1. It goes on with NO primer or sanding. (this is Numero Uno, for me!)
2. Deep, lustrous finish (far nicer than spray paint and less limited in color selection)
3. The chalk makes it self-leveling so there are little to no brushmarks. You can slap-dash this stuff on while sipping soda and singing to Aretha Franklin, no stress about streaks.

Well, sign me up for less stress, right?!


Annie Sloan chalk paint is $35 per QUART. Ouch. That's stressful. I do look forward to buying it, event  (the red looks amazing!) but until then, this is a great substitute. My picture shows a Behr "oops" paint I had in gray...for $2, using an oops paint is an inexpensive way to make sure you like this type of paint.


Like I do with all recipes, I got the basic instructions, then improvised. Basically you want about 2 Tablespoons of grout to 1 cup of paint, then add enough water to mix easily. If you mix the grout and water FIRST, then add to the paint, its not as clumpy.

and here's a tip:
If you don't want to get out the dropcloth for a small project like this, cut down one side of a garbage bag for a disposable "mini-tarp" to paint on.

 
For this table I used a sample pot of my very favorite Benjamin Moore (under $4 at Tommy's Paint Pot, if you are local...great service!) Also, the BM paint made a much smoother chalk paint then the Behr did.
 
Because you add grout and water, and because the coverage is so good, it goes really far. That little sample pot was enough to do two coats on this table, plus a small mirror.

 
I chose this color based on a lovely dresser I saw on one of my favorite decorating blogs, Milk and Honey Home:
 
It makes me happy-happy-happy, this color! Benjamin Moore deep sea Green #735.
 
It is far more aqua than green, a lovely deep turquoise and similar to Annie Sloan's Provence (though this one is a bit darker) according to a friend who has used the original.


I hope you try it, and let me know how it works for you. I'm experimenting with various colors and finishes and will post results on the blog, too!


Sunday, May 5, 2013

You can paint your ceiling fan blades!

My kids don't sit down very often, because Moms motto is "if its holding still? You can paint it." Paint is the simplest and least expensive way to update anything in your life...except, maybe, your kids.

Our dining room ceiling fan is by Hunter. I love that its quiet, and moves air from our living area, which holds the woodstove in Winter and the A.C. Unit in Summer, to the rest of the house. The ceiling fan is almost always on, so the cheap veneer blades are hardly noticeable! But, whenever we turn it off I had to view the dark ugly blades. They are the standard issue...you get two sides from the factory.
Choose from:
A) dark fake cherry or
B) medium fake oak.
I picked C) Woodrow Wilson Putty by Valspar, the lovely new gray I just painted our living room accent wall in!
Here is the not-quite-before...
(because I generally think of a blog post about 1/3 of the way through a project)
You can see that I didn't even primer them, just slapped the paint on after a good scrubbing.
As an aside: Man, ceiling fan blades can get nasty along the edges, can't they?
If you choose to paint your blades, I really recommend a good primer, just to make sure the paint holds up well and doesn't blister or peel off. I've found that Kilz brand or BIN 1-2-3 are both good for helping paint adhere to smooth and shiny surfaces like these.
So if thats the wise choice, why didn't I do it? Well, I was in the middle of painting three rooms of my house and was in a hurry, so I took the risk that I might have to re-paint, later. And my life lives close to that ragged edge, baby!


As for what color to paint them, here are my thoughts on paint...if its something you love and want to highlight? Paint it an amazing, lovely color. Example: a bright red dresser with curvy lines. A funky yellow sideboard in the dining room, a warm green accent wall behind the bed. You want others to notice!
If its utilitarian or ugly? Paint it as neutral as possible so the eye glides right over. It's the reason we ladies wear basic black slacks with an amazing colorful blouse, am I right? Hips are great for childbearing but not the feature we want to highlight, usually.

Ceiling fans are hips. Necessary, but not something we draw attention to. We want them not to wobble, and not to be noticed!
Maybe in a kids room we go bright and colorful with the fan, but everywhere else? Quiet, calm and neutral.

I recently helped a client choose a ceiling fan for her huge living room. Even with 18 foot high ceilings, we went simple. Oil rubbed bronze metal with dark teak blades. Buy quality because you don't want them to shake or be loud. But choose a simple, classic design because ceiling fans, no matter how the manufacturers try to gussy them up? Are hips.


The light gray paint helped our ceiling fan blend in better with the low ceiling, and now it disappears a little more, visually. A simple trick that only took 15 minutes and a little bit of latex paint.


Saturday, May 4, 2013

Making a pillow cover from a recycled sweater

I found this incredibly soft mohair sweater at the local Goodwill for $2.99. I have a deep and abiding love for polka dots, especially black and white dots. This beauty was in all it's 1980s glory, with its v-neck and thick shoulder pads! It was waiting for a stand-up collar, red stirrup pants and bangle bracelets to make its return debut at a Cyndi Lauper concert, but I had something even better in mind...

My couch!

Prepare yourself for the cheesiest, shortest blog tutorial ever.

1. Lay the sweater down.

2. Admire it's fuzzy softness. And yourself, for getting such a bargain.

3. Lay a pillow insert on it, and mark it with pins to approximate size. Remove pillow.

4. Right sides together, sew three edges.

5. Turn it right side out, insert pillow. Sew shut.

6. Enjoy.


Decorators are always pushing pillows because they truly change the feel of a room, adding color, texture and an opportunity for pattern. You can find throw pillows everywhere, even when out for groceries! However, most store-bought pillows should be considered "disposable".

Pretty on your couch, yes, and every sofa needs pillows to feel/look complete! So, if it's a formal living room you rarely use, buy them with no regrets. However, if you USE your living room, upgrade to good pillows. The under $25 Target-Fred Meyer or Walmart pillows are stiff, hard as a rock and chintzy in size...a few months of husbands laying on them or kids throwing them around and the stiffness disappears and all thats left of your lovely accent pillow is a lumpy, saggy mess.

Pillows should be down filled and fluffy, and generous in size. 20 x 20 is ideal, for most sofas. Invest in decent pillow inserts (Pottery Barn has great ones) and simply change the covers whenever they get stained or when you want a fresh look for your living room.

Or when you stumble across an amazing secondhand sweater!


Thursday, April 25, 2013

Bathroom Vanity re-Design for under $60! Staining Oak Cabinets Espresso

 
The Master Bedroom and Bath are often the last rooms to be remodeled because they are not seen. And often, by the time you've renovated the public areas of the home there isn't much money left to tackle the private spaces! We've lived in our home for nine years this May, and have remodeled extensively...now we are finally heading towards the BACK of the house, to our room.
 
This is the sink in our master bedroom. It's a built in, so not easily (or cheaply!) replaced. Being short on funds is a gift, for it is such a boost to creativity...I hope you are inspired by what a difference 3 twenty dollar bills and some DIY skills can accomplish!
 
BEFORE:
                                  
Dingy gray tile counter top with stained grout.
Oak water-damaged back splash and edge.
Chipped white enamel sink.
20 year old plain Jane faucet on top of a honey oak 1980s cabinet.

The blessing is that the cabinet is solid wood, very sturdy and has plenty of storage. Good bones like that are worth keeping, they just need a little cosmetic update!

                              
                                                            AFTER:
A dark and modern vanity with a vitreous white china sink, creamy laminate counter top, solid tumbled stone back splash plus a Kohler single handle faucet.

COST BREAKDOWN:
General Finishes "Java" gel stain $20
Laminate counter-free (re-used something we had)
new sink $15 (Restore)
Kohler faucet $12 (yard sale)
tumbled stone back splash $4 (Restore)
pre-mixed grout $6 (Home Depot)

I found inspiration for this through Pinterest (I'm on there daily. It's such a treat for a visual person like myself! Feel free to follow my boards, my name on there is MorninGlory!)

I followed a link from there to a blog, which breaks down EXACTLY how to stain a vanity. Wonderful directions here, so I will not bore you by repeating them, just go there if you are interested in doing the same:

http://www.monicawantsit.com/2012/02/staining-oak-cabinets-espresso-color.html

She says "no substitutions! Use THIS BRAND ONLY!"

Sadly, I ignored both the caps and exclamation points because I am a rebel. When I found out I had to special order this stain I was too impatient to wait (which is dumb, you can get it on Amazon in 2 days) and it seemed high in cost. $20 for a little quart? So, I tried to save time and money by using a different stain that Almighty Google assured me was similar...

NO.
 
Instead of a lovely dark java espresso stain? Mucky dark streaks. I madly swiped it off. I tried several coats. I ruined my cabinets, basically. (also smeared it accidentally all over the nearby wall and ended up having to re-paint that, too. ugh.)
 
Now staining my cabinets was no longer a fun option but a dire necessity! I sanded the mess off, logged onto my Amazon account and ordered the correct stuff.
 
Listen, I am all about saving money, but using good materials DOES save money, in the long run. For instance;
I just painted my kitchen. I forked out over fifty bucks for a gallon of Benjamin Moore because I wanted a very specific color and didn't want to risk color matching (posts with photos to come!) That gorgeous paint went on like yogurt, covering a deep mid-tone green with a pale aqua blue in ONE COAT. When I did the living room a few days later, I was kicking myself for not using Benjamin Moore. I had read that Behr's 'Swiss Coffee' was an exact copy of BM's 'Cloud White'. It may be the same color but it is NOT the same quality. It ended up costing the same $$ amount (4 gallons at $25 apiece versus 2 from B. Moore at $50 each) but it cost me TWICE as much time. And as we all know...time IS money.
 
(If you are on a tight budget it is better to get Walmart paint, instead of Home Depots best Behr paint, it's horrid. Truly. It spatters, it barely covers, even the higher end stuff with "added primer". I've painted rentals and kids rooms with Walmart brand (their Antique White is actually a very lovely creamy neutral) and always find it to be a great, though basic, paint. For only $18 or so a gallon it has far better coverage than Valspar or Behr!)
 
 
Lots of sanding later...which is ironic, because the very thing that attracted me to this DIY project was the promise "no sanding!" Learn from my stubbornness...get the right stain and follow directions. The Java gel stain went on thick and beautiful, covering perfectly both the wood I had painstakingly sanded AND the doors that still had poly finish on them.

 
This counter was my nemesis for years. Makeup, toothpaste and grime was continually collecting in these grout lines. I hate tile on counters, because it never feels CLEAN, no matter how you scrub. Tile floors are cold and if you drop a dish, it shatters. Tile showers are a daily chore to keep mildew-free and eventually they leak. Where will I willingly put tile, you ask?
An entryway. In front of a fireplace. As a backsplash. And that's it!
 
You see those "back splash" strips of oak? Pried them off with my favorite tool...
 
 
a butter knife. My husband doesn't understand. He tries to tell me it's only purpose is spreading condiments. However, us creative types see things differently. It's a Flathead screwdriver and also a crow bar that pries almost anything off! Except, apparently, ugly tile.
Then it snaps in half.
 

This is the new laminate counter...much easier to clean! It was a counter remnant, bought a few years ago at Lowe's and used for a desk top.  My sweet husband cut it to fit the space.

I'm not allowed to use the table saw since I cannot handle even utensils correctly.


The lovely Kohler faucet is a bargain that I picked up at a yard sale and tucked away, hoping to do the bathroom "soon". It sat patiently in the garage for years, waiting for that elusive "someday" to arrive. If you see a quality item, jump on it. Maybe the renovations won't be completed as quickly as you hope, but when the time DOES come, your expenses will be far less because of those bargains you stashed away. Craigslist has a great category under 'For Sale' called 'Materials'. I scan it weekly for great deals on tile, windows, lighting, stone and more. If you know you'll be eventually updating parts of your home, it's worth looking early!


Another great source for bargains is your local ReStore. It is a thrift store that supports Habitat for Humanity (If you live local, it's on Oak Patch off of West 11th Ave) and it is full of both new and used materials. People who are renovating donate their materials when they update
(A treasure hunt if you are looking for mid-century lighting fixtures for your atomic ranch, or glass doorknobs for your Victorian cottage!)

and new stores donate extra stock for tax write-offs, too. High quality and new-but dented items are often there, though in smaller quantities. I found the tumbled stone tile (above) for under $5, despite being brand new. There were only a few sheets, but for small projects like a bathroom this is to your advantage!


To sum up, here is my advice for renovating even when you are on a TEENSY budget:

--Keep your color scheme neutral and materials basic. Focus on simply improving the basic functions of your current space rather than on creating new, custom or glamorous remodels. Laminate may not be my number one choice, but compared to dingy gray tile? It's an upgrade! Progress, not perfection is the rule when you are on a tight budget. (Actually, it's a great rule for anyone, am I right?)

--Know when to skimp and when to splurge. Materials matter! And if an expert insists on a certain gel-stain? Don't be impatient or rebellious. Unless it involves cutlery, then go for it.

--Shop beyond the Home Depot and the fancy Tile Store. Scour yard sales, Craigslist and thrift shops for the materials you need, and store them until you are ready to begin.

--If you don't know how to do something? YouTube has videos that will teach you almost ANYTHING. I had never installed a tile back splash before but was driven to desperate by my desire to get rid of those nasty oak strips. Bonus-when your project is complete you have more than just a lovely home improvement. You've added a new skill to your repertoire!

--Focus on the blessings. I would love double sinks but realize that having one is a gift. I only have to share with my husband, and not my three teenage sons! I'd like solid surface countertops, and I'd love to frame the mirror but if neither ever happen, that's okay. We honor God by being good stewards of the time and money He's given, and by being content with what He's given!

Grateful for my new vanity and hoping it inspires YOU!