Monday, May 27, 2013

Easy curb appeal, and salt to banish weeds!

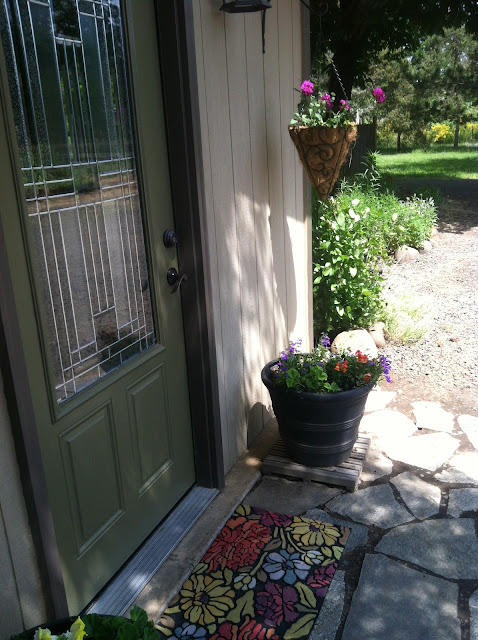
Cheerful, happy AFTER!:
 

Winter is over! I celebrated in one of my favorite ways: the annual sprucing up our front entry.

                                                         Sad, neglected BEFORE:


Five years ago, we enclosed our front porch to create a mudroom. I love having that extra space, but miss having a covered front porch when it's pouring rain, as it often is here in Oregon. More than that even, I miss having a cute little porch to decorate!


Our driveway is now right outside the door, and I do love how it makes the constant unloading of the-crazy-amount-of-groceries-my teens-eat a breeze.

Handy, but not very pretty. In an attempt to have an entryway other than dusty gravel driveway, I dug and laid large, simple flagstone remnants into a half-circle, five years ago.

And the weeds found the dirt there, and lo, they multiplied:


 I am very sensitive to herbicides so we try not to use Round-up excessively. My son is a  history buff and so he suggested salt as the solution:

"It's what enemies would do after a battle, Mom! They sowed salt into all the fields so the conquered people wouldn't be able to grow food and would starve."

yikes.

Well, Morton's salt is .28 cents, safe to all but slugs and, it turns out...quite effective!


First, I pulled all the little weeds. Sprinkled a full can of salt around all the pavers and watered it in gently. It's been over a month of rain and alternating sunshine, yet not ONE teensy baby sprout of a weed has popped up...

I am the Victor of this battle!

 
It's a good idea to re-paint your front door and trim,  occasionally. A good scrubbing first, then a light coat rolled on just to erase those scuffs and marks that won't wipe off. Does anyone else have kids that like to kick the door open, when their arms are full? Lots of suspicious tennis shoe marks, here!


What a difference!


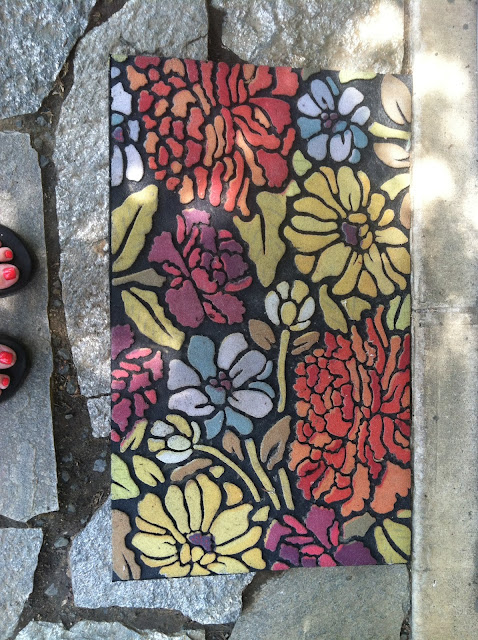
I buy a new front doormat every year, as the constant weather exposure wears them out quickly. I like Target's selection but was happily surprised by this floral loveliness, found  at Wal-mart.

Bonus-it matches my fun Summer toenail polish!


A little elbow grease in cleaning and weeding...
A bit of fresh paint rolled on...
A few colorful flowers tucked into pots...
A new doormat laid out...

A fresh re-design that says:

Welcome, family and friends!


Saturday, May 25, 2013

Update your furniture with homemade Chalk Paint

After:
 
 
Before:
 
 
I've had this little end table for years. I had found the vintage gym basket "drawers" for it, long before they were collectible and expensive, and so it has faithfully served in various places around our home for almost ten years. Most recently it was a nightstand in my 13 year old sons' room...and its shabby look got...well...shabbier. A decade of use had left its marks!
 
 
Several nicks and dings and a giant gouge out of the top, yet no one saw how or why...
Boys and destruction...you can't have one without the other, folks!

 I wanted to bring this back into our living room but it was too beat up...I wanted to add some deep turquoise, almost peacock teal color to the room...and I wanted to experiment with DIY chalk paint. Plus, I had a 2 liter of cold Diet Pepsi in the fridge.

It was a perfect storm...
 
 I conferred with almighty Google and found a recipe on
www.inmyownstyle.com/2013/02/diy-chalk-paint-review-update.html
and because of my mosaic hobby, I happened to have unsanded grout, so that's what I used, but you can also use plaster of Paris.

What are the benefits of chalk paint vs. spray or latex, you ask?

1. It goes on with NO primer or sanding. (this is Numero Uno, for me!)
2. Deep, lustrous finish (far nicer than spray paint and less limited in color selection)
3. The chalk makes it self-leveling so there are little to no brushmarks. You can slap-dash this stuff on while sipping soda and singing to Aretha Franklin, no stress about streaks.

Well, sign me up for less stress, right?!


Annie Sloan chalk paint is $35 per QUART. Ouch. That's stressful. I do look forward to buying it, event  (the red looks amazing!) but until then, this is a great substitute. My picture shows a Behr "oops" paint I had in gray...for $2, using an oops paint is an inexpensive way to make sure you like this type of paint.


Like I do with all recipes, I got the basic instructions, then improvised. Basically you want about 2 Tablespoons of grout to 1 cup of paint, then add enough water to mix easily. If you mix the grout and water FIRST, then add to the paint, its not as clumpy.

and here's a tip:
If you don't want to get out the dropcloth for a small project like this, cut down one side of a garbage bag for a disposable "mini-tarp" to paint on.

 
For this table I used a sample pot of my very favorite Benjamin Moore (under $4 at Tommy's Paint Pot, if you are local...great service!) Also, the BM paint made a much smoother chalk paint then the Behr did.
 
Because you add grout and water, and because the coverage is so good, it goes really far. That little sample pot was enough to do two coats on this table, plus a small mirror.

 
I chose this color based on a lovely dresser I saw on one of my favorite decorating blogs, Milk and Honey Home:
 
It makes me happy-happy-happy, this color! Benjamin Moore deep sea Green #735.
 
It is far more aqua than green, a lovely deep turquoise and similar to Annie Sloan's Provence (though this one is a bit darker) according to a friend who has used the original.


I hope you try it, and let me know how it works for you. I'm experimenting with various colors and finishes and will post results on the blog, too!


Sunday, May 5, 2013

You can paint your ceiling fan blades!

My kids don't sit down very often, because Moms motto is "if its holding still? You can paint it." Paint is the simplest and least expensive way to update anything in your life...except, maybe, your kids.

Our dining room ceiling fan is by Hunter. I love that its quiet, and moves air from our living area, which holds the woodstove in Winter and the A.C. Unit in Summer, to the rest of the house. The ceiling fan is almost always on, so the cheap veneer blades are hardly noticeable! But, whenever we turn it off I had to view the dark ugly blades. They are the standard issue...you get two sides from the factory.
Choose from:
A) dark fake cherry or
B) medium fake oak.
I picked C) Woodrow Wilson Putty by Valspar, the lovely new gray I just painted our living room accent wall in!
Here is the not-quite-before...
(because I generally think of a blog post about 1/3 of the way through a project)
You can see that I didn't even primer them, just slapped the paint on after a good scrubbing.
As an aside: Man, ceiling fan blades can get nasty along the edges, can't they?
If you choose to paint your blades, I really recommend a good primer, just to make sure the paint holds up well and doesn't blister or peel off. I've found that Kilz brand or BIN 1-2-3 are both good for helping paint adhere to smooth and shiny surfaces like these.
So if thats the wise choice, why didn't I do it? Well, I was in the middle of painting three rooms of my house and was in a hurry, so I took the risk that I might have to re-paint, later. And my life lives close to that ragged edge, baby!


As for what color to paint them, here are my thoughts on paint...if its something you love and want to highlight? Paint it an amazing, lovely color. Example: a bright red dresser with curvy lines. A funky yellow sideboard in the dining room, a warm green accent wall behind the bed. You want others to notice!
If its utilitarian or ugly? Paint it as neutral as possible so the eye glides right over. It's the reason we ladies wear basic black slacks with an amazing colorful blouse, am I right? Hips are great for childbearing but not the feature we want to highlight, usually.

Ceiling fans are hips. Necessary, but not something we draw attention to. We want them not to wobble, and not to be noticed!
Maybe in a kids room we go bright and colorful with the fan, but everywhere else? Quiet, calm and neutral.

I recently helped a client choose a ceiling fan for her huge living room. Even with 18 foot high ceilings, we went simple. Oil rubbed bronze metal with dark teak blades. Buy quality because you don't want them to shake or be loud. But choose a simple, classic design because ceiling fans, no matter how the manufacturers try to gussy them up? Are hips.


The light gray paint helped our ceiling fan blend in better with the low ceiling, and now it disappears a little more, visually. A simple trick that only took 15 minutes and a little bit of latex paint.


Saturday, May 4, 2013

Making a pillow cover from a recycled sweater

I found this incredibly soft mohair sweater at the local Goodwill for $2.99. I have a deep and abiding love for polka dots, especially black and white dots. This beauty was in all it's 1980s glory, with its v-neck and thick shoulder pads! It was waiting for a stand-up collar, red stirrup pants and bangle bracelets to make its return debut at a Cyndi Lauper concert, but I had something even better in mind...

My couch!

Prepare yourself for the cheesiest, shortest blog tutorial ever.

1. Lay the sweater down.

2. Admire it's fuzzy softness. And yourself, for getting such a bargain.

3. Lay a pillow insert on it, and mark it with pins to approximate size. Remove pillow.

4. Right sides together, sew three edges.

5. Turn it right side out, insert pillow. Sew shut.

6. Enjoy.


Decorators are always pushing pillows because they truly change the feel of a room, adding color, texture and an opportunity for pattern. You can find throw pillows everywhere, even when out for groceries! However, most store-bought pillows should be considered "disposable".

Pretty on your couch, yes, and every sofa needs pillows to feel/look complete! So, if it's a formal living room you rarely use, buy them with no regrets. However, if you USE your living room, upgrade to good pillows. The under $25 Target-Fred Meyer or Walmart pillows are stiff, hard as a rock and chintzy in size...a few months of husbands laying on them or kids throwing them around and the stiffness disappears and all thats left of your lovely accent pillow is a lumpy, saggy mess.

Pillows should be down filled and fluffy, and generous in size. 20 x 20 is ideal, for most sofas. Invest in decent pillow inserts (Pottery Barn has great ones) and simply change the covers whenever they get stained or when you want a fresh look for your living room.

Or when you stumble across an amazing secondhand sweater!